So I have already told you about me Pinterest web addiction. On there I run across a trillion tutorials and ideas. I saw this and had inspiration to make my own. This is a very easy and inexpensive project. It is also highly customizable which I love! I think I a spent about $10 in total to get the supplies but I have plenty of left overs for other projects I already have in mind. Some of you may already have some of this stuff lying around your house or tucked in you craft bins.
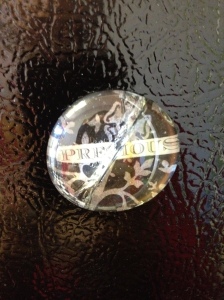
This is what we are making.
Alright….. On to the tutorial.
Here is what you will need.
- Some glass stones or tiles. Make sure the back is flat. ( I found mine at the dollar store)
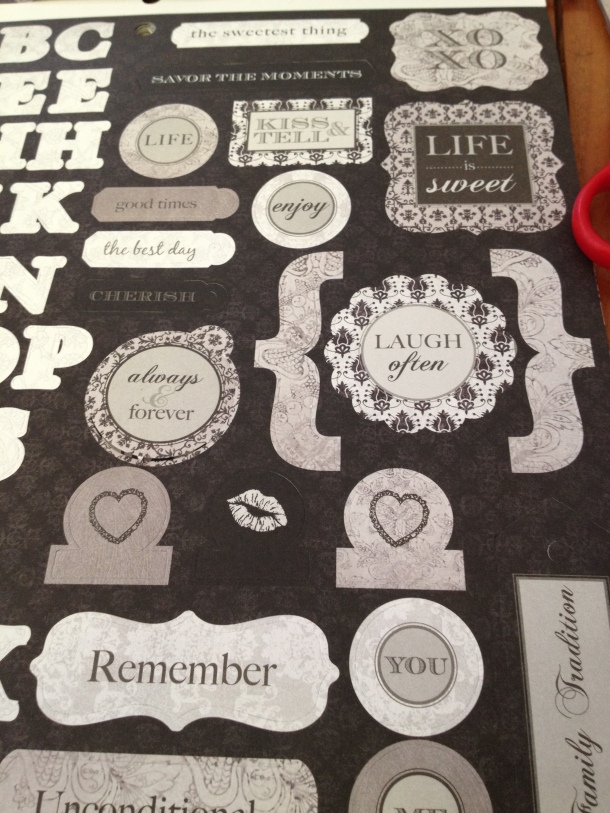
- Some pretty paper with designs or words or what ever you like. (I bought a scrap-book pack at Walmart for $5 that had papers stickers and die-cuts… Here is where you can get super creative. I chose black white and grays because my kitchen is primarily those colors)
- e-600 glue or your favorite craft glue just check that it works on glass and dries clear
- scissors
- a pencil
- magnets. Now here you can again pick what you prefer. I wanted the round button ones but all they had left in Walmart’s very small craft section was a long magnet strip. I HATE that Hobby Lobby is closed on Sundays!
- Markers if you are handy with a pen and want to draw or write stuff on the papers. (Me not so handy! I tried a few things out and hated it all)
- paper towel or news paper to cover your work surface
Now Originally I went into this thinking I would make some pretty cool letter magnets for my 3-year-old Finnegan. When I got home I realized that the letters that came with the pack I bought were too big for my stones so I decided to make something a little prettier and I will work finding cute letters to make an alphabet for my son.
Alright….. Here we go.
This pack of paper had some really cute tags that worked perfect for my purposes.
So I picked one that I liked and decided to start there. You can pick any back ground you want, add stickers or draw, what ever works for you.
You can see that the paper is bigger then the glass stone so place you stone where you want it to be. In my case, centered above the words and use a pencil to trace around the stone. Try to get as close as you can.
Then cut out the circle but cut a little inside the circle so you can’t see the line and the stone will completely cover the paper. Once it is cut out you may need to trim it a little so the paper doesn’t stick out since the stone has rounded edges. If you use square tiles you probably wont have to worry about this.
Take your E-6000 glue and in a thin layer cover the back part of the stone. It doesn’t have to be perfect or smooth. When you push the stone onto the paper push down hard and watch as the bubbles push out and the glue evens out. This might take a few tries to get the amount of glue just right so you don’t have it seeping out of the sides. Once you are done with this. Turn it upside down and give it a few min to set. Then you want to cut a piece from your magnet strip to fit, apply a little glue and stick it on. This part doesn’t have to be perfect. It’s the back and no one will see it. If you were about to find the round magnet disks then you wont have to worry about cutting anything. Just glue and place.
Because I am so impatient I waited about an hour and put them on the fridge to get a pictures.
Since I was so hasty in putting my magnets to use I learned a few things…
#1- the strips I cut were not big enough to support the weight
#2- if you don’t let the glue dry long enough the weight will cause them to slide right off the magnet onto the floor
and
#3- if they fall hard enough they will break
Here was my causality 😦
So…. I took all the magnets down, took all the magnet strips off, and cut little circles of magnets instead.
So now that you have the magnets glued on and are going to be very patient and let them dry for 12-24 hours or whatever your glue’s dry time is, turn them right side up so the pressure keeps the magnets in place on the stones (you can also put something heavy on top to help this like I had to do since my magnet strip was curved) and wait for them to dry.
You now have some darling magnets for your fridge that are exactly your style! Feel free to make this as funky or sophisticated as you would like. These would also make great gifts with photos of the kids or for larger tiles you could do quotes. I fully intend to make many more of these.
I hope you enjoyed this tutorial. If you make them I would love to see what you did with them so post me a pic.
😀


Those are very very cute love them
Thanks!!